Fore-aft, rotation, float, stance width, wedges and shims: a step-by-step cleat setup, what the research shows and how to copy it to new shoes.
Cleat position decides where and how the foot meets the pedal, in five directions: fore-aft, rotation, sideways, tilt and height. A sound starting point puts the pedal axle under or slightly behind the ball of the foot and turns the cleat to match the rider's natural foot angle. Float then lets the knee find its own line. Wedges and shims come last, and only for a measured reason. Check the rider pedalling, and write every number down for each foot separately.
Before you start: tools and landmarks
Good cleat work is mostly careful marking. Have these ready:
- A fine marker, masking tape and a steel ruler or callipers.
- A protractor or a cleat alignment tool for rotation.
- The right hex key for the cleat bolts and a torque wrench set to the shoe maker's figure.
- New cleats if the old ones are worn, because worn cleats change both float and engagement.
- A high bench the rider can sit on with the legs hanging free.
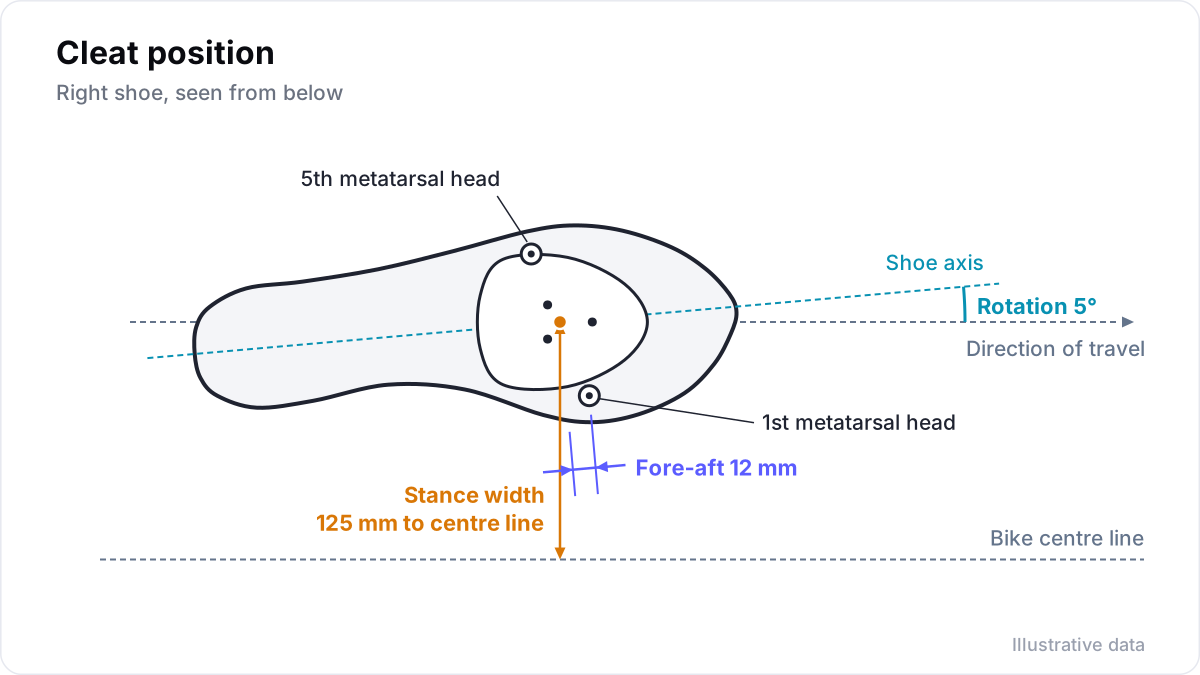
Find the landmarks on the foot first. The first metatarsal head is the bony bump behind the big toe on the inner side of the foot. The fifth is the bump behind the little toe on the outer side, and it usually sits further back. Mark both on the side of each shoe with the rider's foot inside, then draw a line across the sole between them. Do both feet, because feet often differ in length and shape.
Should the cleat sit under the ball of the foot?
The usual starting point puts the pedal axle under the ball of the foot or a few millimetres behind it. Research shows no clear speed gain from moving the cleat further back towards the arch, so treat fore-aft as a fit and comfort choice.
Fore-aft is the distance along the shoe between the ball of the foot and the pedal axle. The 2024 expert consensus on bike set-up measurements (Priego-Quesada and colleagues, Sports Medicine) defines it precisely. It is the horizontal distance from the centre of the first or the fifth metatarsal joint to the pedal axle, with the pedal level. Say which one you used, and record left and right separately.
The traditional setting puts the axle under the first metatarsal head. Some fitters start with the axle a few millimetres behind it, between the first and fifth heads. Some triathletes and long-distance riders go much further back, towards the arch, which is often called a mid-foot cleat.
The research does not show a clear speed gain either way:
- Van Sickle and Hull (2007) tested eleven competitive cyclists with the foot forward, in the middle and at the rear, halfway between the first metatarsal head and the heel. Foot position had no significant effect on oxygen use.
- Paton (2009) compared ten competitive cyclists in their usual position and an arch position. He found no substantial physiological or performance advantage.
- Viker and Richardson (2013) found aft cleats gave thirteen triathletes no benefit in the 5 km run after the bike. The first kilometre was 2.1% faster with traditional cleats.
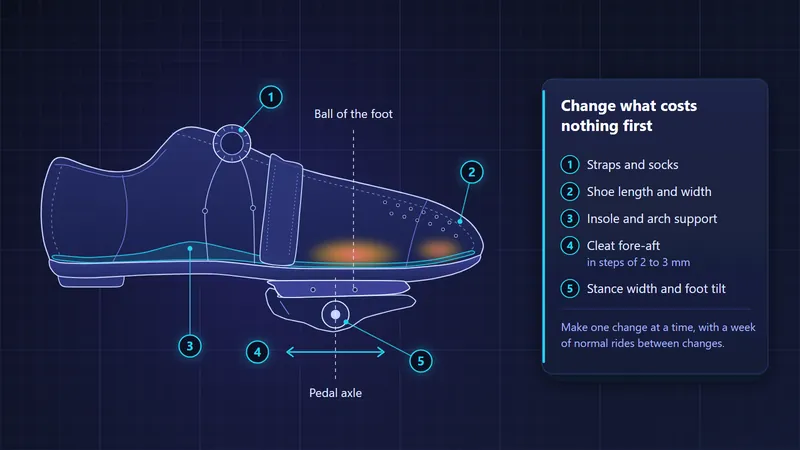
So treat fore-aft as a fit and comfort choice. Moving the cleat back shortens the lever from ankle to axle, which usually means lowering the saddle a little. The saddle height guide explains how to recheck the knee angle afterwards. Move the cleat a few millimetres at a time, and match both feet to the foot's landmarks, not to the slots on the sole.
How should cleats be rotated?
Turn each cleat so it follows the rider's natural foot angle rather than the line of the shoe. Feet often point slightly outwards. Rotation is the angle of the cleat on the sole, and it sets where the heel sits when the float is centred.
Two simple ways to see that angle:
- Sit the rider on a high bench, legs hanging and relaxed, and look down at the line of each foot.
- Watch the rider pedal from above and behind, and see where each heel wants to sit.
What is cleat float?
Cleat float is the free rotation the cleat allows before it starts to release. Pedal makers offer a fixed set of choices, and the figure they give is the total range from one end to the other.
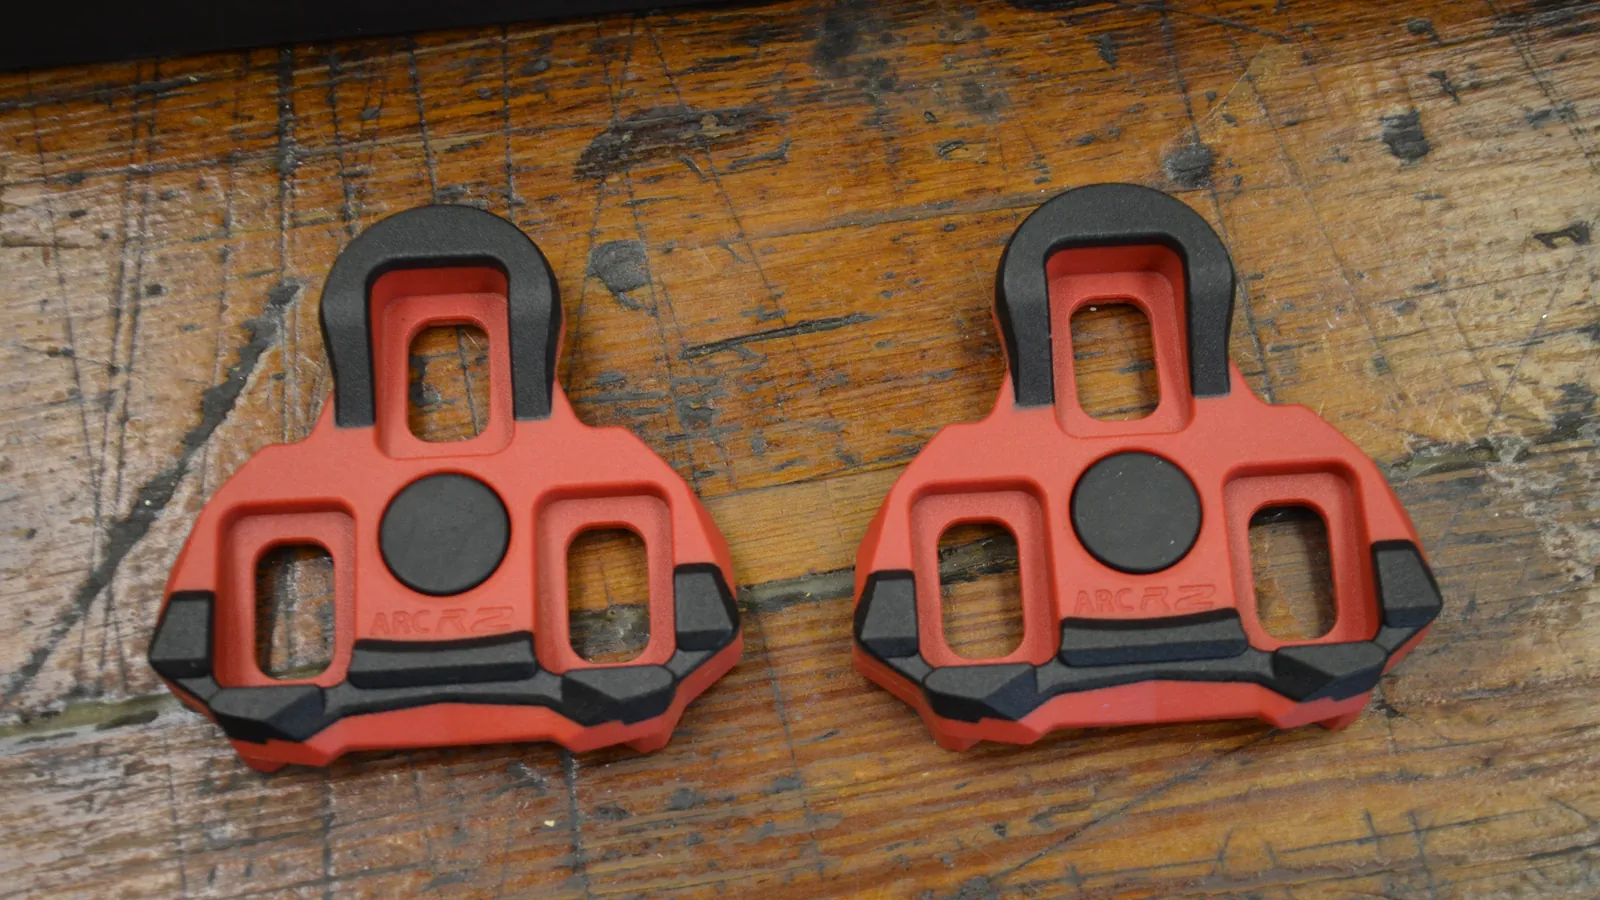
Shimano's SPD-SL cleats come with 0, 2 or 6 degrees of float (red, blue and yellow). Look's Kéo cleats come with 0, 4.5 or 9 degrees (black, grey and red). So 6 degrees of float means about 3 degrees each way.
Float is not a cure for a badly rotated cleat. If the heel rests against one end of the float on every stroke, the rotation is wrong, so turn the cleat rather than buying more float. Change rotation by a degree or two at a time, and record it with a direction. Heel in or heel out is clearer than plus or minus.
Is a narrower Q-factor better?
A narrower Q-factor is not automatically better. In a laboratory study, narrow and wide Q-factors differed in efficiency by an amount worth only a few watts at a steady effort. A knee that tracks well over the foot is a better guide to stance width than any single number.
Stance width is how far each foot sits from the bike's centre line. It depends on three things: the Q-factor, the pedal axle length and where the cleat sits sideways on the sole. Q-factor is the distance between the outer faces of the crank arms, measured where the pedals thread in.
Research by Disley and Li gives a useful sense of scale. In 2014 they had 24 trained cyclists pedal in the laboratory at Q-factors of 90, 120, 150 and 180 mm. Gross efficiency, the share of the energy used that reaches the pedals, was 19.38% at the two narrow widths and about 19.1% at the two wide ones. That is a small difference, worth only a few watts at a steady effort. In a second study, ten cyclists' own preferred width, 142 mm on average, gave the most favourable mix of efficiency and knee stability. A simple hanging task predicted that width well.
For a fitter, that means watching the knees from the front at a steady effort rather than chasing a narrow number. There are three ways to change stance width:
- Move the cleat sideways on the sole, usually by a few millimetres.
- Fit pedals with longer axles, which some makers offer.
- Add pedal washers, within the pedal maker's guidance.
When do you need cleat wedges?
Use cleat wedges only for a measured reason, such as a forefoot tilt that makes the foot roll inwards on the pedal. Decide from the rider's own forefoot angle and from how the knee tracks while pedalling, not from what most feet are said to need.
Many feet are tilted at the forefoot, so the big-toe side sits higher than the little-toe side when the foot is relaxed. This is called forefoot varus. On a flat pedal, that foot rolls inwards under load, and the knee may follow it. A varus wedge is thicker on the big-toe side and brings the pedal surface up to meet the foot. A valgus wedge is the reverse.
Some cycling shoes build a small varus tilt into the sole. Shoes of this kind grew out of Dr Andy Pruitt's work on foot stability and the alignment of hip, knee and foot in the late 1990s. Separate cleat wedges usually come in steps of about 1 to 1.5 degrees. They can be stacked, but adding them usually means longer cleat bolts. In-shoe wedges do the same job above the sole.
Decide on wedges from what you measure, not from what most feet are said to need. A fitter checks the forefoot angle with the rider relaxed and the ankle in a neutral position. They then confirm it with the rider pedalling, by watching how the knee tracks from the front. Recheck stance width after adding wedges, because the knee's line changes.
Should you shim cleats for a leg-length difference?
Shim a cleat for a leg-length difference only after a physiotherapist or doctor has assessed it, because a tape measure on its own is the least accurate way to measure a difference. A cautious approach then corrects part of the measured difference first, with a spacer under the cleat of the shorter leg.
A difference in leg length can be structural, in the bones, or functional, coming from the pelvis, hips or muscles. Telling the two apart takes an examination by a physio or doctor, so share their finding with the fitter. Our article on how a physio and a bike fitter work together shows how that hand-over can work.
A shim is a flat spacer under the cleat of the shorter leg. A cautious approach is to correct part of a measured difference first and watch how the rider responds. Thick shim stacks need longer bolts and change how the cleat sits in the pedal, so check engagement and release after fitting them.
How do you copy cleat position to new shoes?
Record each cleat's fore-aft distance, sideways position and rotation, then set the same numbers on the new shoe from the ball of the foot. A cleat setup that took two hours to find should take ten minutes to copy. Record each foot separately:
| What to record | How |
|---|---|
| Fore-aft | Millimetres from the first metatarsal head to the pedal axle, and which way |
| Sideways | Millimetres from the centre of the sole, inwards or outwards |
| Rotation | Degrees, heel in or heel out |
| Float | Pedal system and cleat model |
| Wedges | Number, direction, under the cleat or in the shoe |
| Shims | Thickness in millimetres |
| Pedals | Model, axle length and any washers |
| Shoes | Model, size and insoles |
Copy the relation to the foot, not the position on the sole. Shoe makers place the bolt slots differently and soles curve differently, so a cleat set 20 mm from the toe of one shoe can sit somewhere else entirely on another. Mark the first metatarsal head on the new shoe, set the same fore-aft distance and rotation, and ride for a short, easy session before a long one. Then compare the knee's line from the front with your notes.
Keep the record with the rest of the fit, dated and with the reason for each change. A bike fit history makes the next change easier to judge. The same notes are the starting point for moving your fit to a new bike. Velograph's fit record keeps these measurements for each foot separately, so a new pair of shoes starts from known numbers.
Further reading
- Is economy of competitive cyclists affected by the anterior-posterior foot position on the pedal?, Journal of Biomechanics, 2007.
- Effects of shoe cleat position on physiology and performance of competitive cyclists, International Journal of Sports Physiology and Performance, 2009.
- The effect of Q factor on gross mechanical efficiency and muscular activation in cycling, Scandinavian Journal of Medicine and Science in Sports, 2014.
Velograph is not affiliated with, sponsored by or endorsed by any team, rider or company named in this article. Names are used only to refer to publicly reported work.